Course · Part 3 · Assignment 6
Read ![]()
File Management Basics
KeyThree
The key points from this assignment.
- Good file management benefits your work, as well as colleagues and clients
- Keep your design files clean and organised by naming layers, grouping objects, and setting up styles and components
- Regularly save versions of a file, so that you can see how a project developed or move back to a previous version if needed

Image credit: Miguel Padriñán
Introduction
In this assignment, we’ll cover how to create a helpful naming system for your design files, and how to group and name layers within those files. Before we get into those details, though, let’s run through some of the benefits of good file management.
The benefits of good design file management
Here are just a few ways that good file naming and organisation can benefit you, your colleagues, and your clients.
- It makes files easier to find. Files go missing more often than you might think, and this can be a big problem if future work depends on having the originals. Clear and consistent naming can make file location quicker and more reliable, and protect files from accidental deletion.
- It helps you to create new versions of work. Keeping your design files well structured makes it easier to duplicate your existing work and create a new version. The practice of saving different versions of work also allows you to refer back to previous iterations.
- It makes it easier for you to return to a project. Leaving each file neat and tidy, with layers and groups clearly organised and named, will allow you to understand things if you return to a project after several months or years.
- It promotes design consistency. Using styles, components, and templates will help you to apply design decisions across a project in just a few clicks.
- It will help your colleagues and clients. If they need to work directly with your files in future, or hand over the work to another designer, it’ll be a big help if your files are understandable. (It’ll also earn you compliments.)
The rest of this assignment covers five pieces of advice for good file management. As we said in the last assignment, start applying these tips now! Learning how to get these things right while you’re a design student will make your life much easier in your first design job.
5 file management tips
1. Name your files consistently
There are many systems you can use to name your files. The most important thing is that you choose one system, and use it consistently.
We like to include a date in the filename itself, because “date modified” or “date created” can become unreliable when files are moved between different drives and computers.
We also like to structure dates like this: YYYY-MM-DD (for example, 2020-10-30), and then put that at the start of the filename. This means that sorting alphabetically by filename will give you a reliable chronological list of files. Here’s an example:
2020-09-07 Baseline Project Brief.pdf
2020-09-11 Baseline Meeting Notes.pdf
2020-10-03 Baseline Moodboards.sketch
2020-10-04 Baseline Moodboards v2.sketch
2. Name and group objects and layers
Most design software, including Figma, Sketch, Photoshop, Illustrator, and InDesign, uses objects and layers like text, shapes, and images. Each layer has a name, which usually defaults to something like “Rectangle 1”, “Text layer”, etc.
Here are two simple steps you can take to keep your file organised and understandable.
- Keep elements grouped. When you create a visual or logical group within a design, it’s usually a good idea to group those elements together in the software, too. To create a group in Figma, select the objects you want to group together, and then press command G on Mac, or control G on PC.
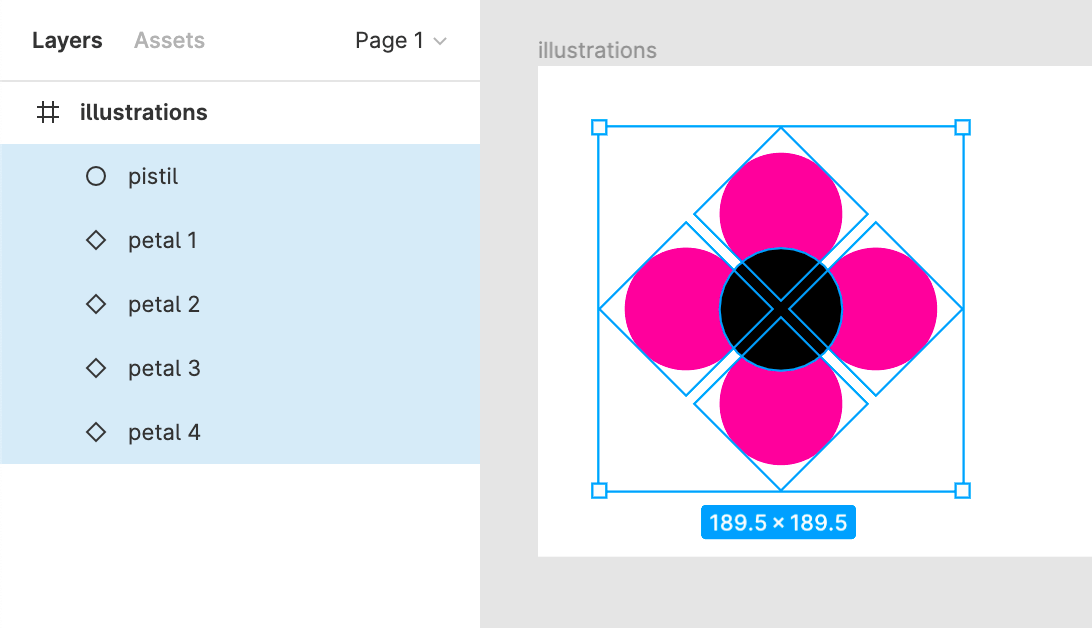
Selecting multiple elements in Figma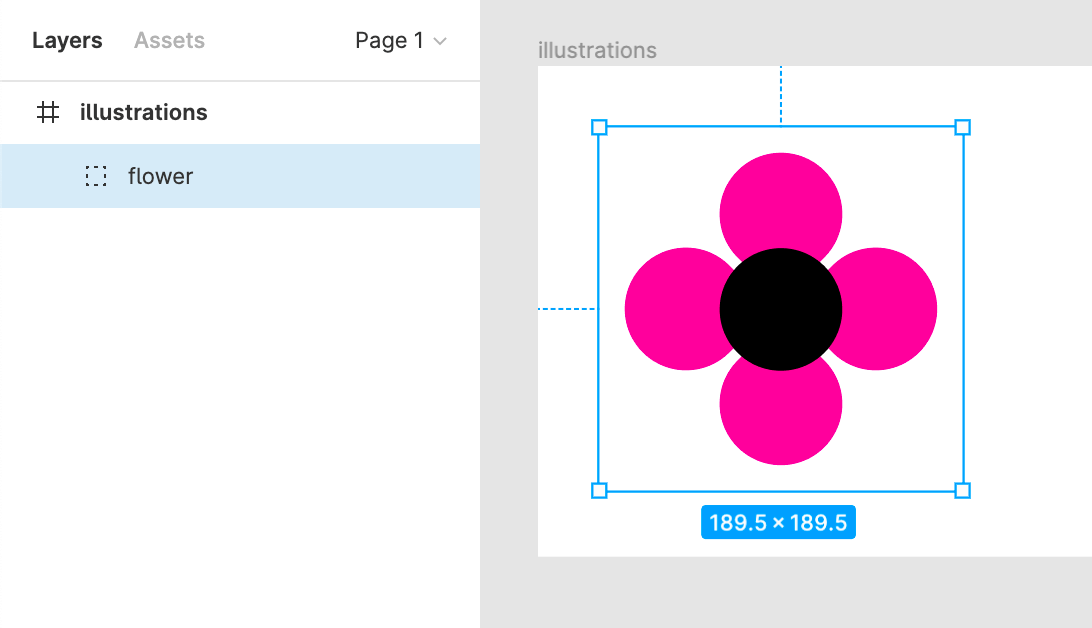
Multiple elements after being grouped in Figma - Give groups and frames meaningful names. Particularly in large files, having thousands of groups called “Group” and hundreds of frames named “Frame” can become pretty baffling — so give all your groups and frames names that describe their content or explain their function. To rename anything in Figma, select it, and then press command R on Mac, or control R on PC. You can then type in the new name.
3. Save file versions regularly
In Figma, periodically saving versions of your work can be as simple as duplicating the frame you’re working on, so that you can look back at previous iterations.
Alternatively, you can select the File menu, and then click “Save to version history”. In other software, you can simply make a copy of the file you’re working on, and add a version number to the file name.
How you do this will depend on the software you’re using. For example, Figma has the option to “save to version history”, which will allow you to go back to that version without having to save a separate file.
However, with more traditional software like Photoshop, Illustrator, and InDesign, to save a separate version, you’ll need to create a duplicate file.
We recommend doing this any time you make significant changes. Keeping these versions can also be helpful for documenting your process, whether that’s for presentation to a client, or for inclusion in a case study for your portfolio.
When saving a version of a file, we recommend including both an updated date and a version number in the file name, for example:
2020-11-02 Arts Magazine v3.indd
2020-10-27 Arts Magazine v2.indd
2020-10-24 Arts Magazine v1.indd
4. Be careful when inserting images
Pasting a lot of photos or other raster images into a design file can create very large file sizes, which can make your computer run slowly or, for cloud services like Figma, result in slow load and save times.
In Figma, Sketch, and Adobe XD, aim to avoid pasting in too many photos. Generally you’ll be using these packages for interface design, so it’s unlikely you’ll need to use a lot of photos.
In Photoshop, creating a lot of raster layers in the same file can cause problems because of the way Photoshop manages computer memory. For example, if you create an animated GIF with lots of frames in Photoshop, you can encounter “scratch disks are full” errors. (We’ll come back to creating GIFs in Photoshop later in the course.)
In InDesign, always avoid pasting photos into your files directly. Instead, follow these steps:
- Save the photo you want to use to the same folder as your InDesign file.
- In InDesign, select File > Place, or press command + D (Mac) or control + D (PC) to access the same command.
- Select your photo in the dialog box.
- Click, or click and drag, to place the image into your design.
Following these steps means that InDesign creates a “link” to the image file, instead of saving the image inside your InDesign file. This will prevent your file getting too big, and it will also help printers when you send your file away for print.
5. Use styles, components, and page masters
Most design software allows you to create styles, components, and templates for design elements that repeat. For example, you can set up a text style for headings. Doing this means that if you want to change the heading font, for example, you only need to edit the style once, and all the headings in your document will be updated automatically.
Similarly, in tools like Figma, you can create “components” that allow you to repeat a group of elements — say, a button design — and just make changes to the master copy to update it throughout a design. And in InDesign, you can use “page masters” to maintain consistent layouts from one page to the next.
In conclusion...
Although typing filenames and naming layers can be boring and feel like needless admin, good file management has tangible benefits to you, your colleagues, and clients. Start as you mean to go an, and adopt these practices today!
In the next assignment, it’s time to explore how you can complement a robust workflow and file management practices with high productivity. (Spoiler alert: high productivity means working less, not more.)