Course · Part 4 · Assignment 15
Read ![]()
Using Colour in Figma
KeyThree
The key points from this assignment.
- Most design software has a colour picker that looks something like Figma’s
- The main things to understand are the colour picker itself, the hue slider, and colour codes
- Colour styles are a useful feature for managing the colours within a project
Image credit: Figma
Introduction
In this assignment, we’ll examine Figma’s colour picker in detail, and share some tips for how to use colour styles to make colour changes across a whole project.
The colour picker
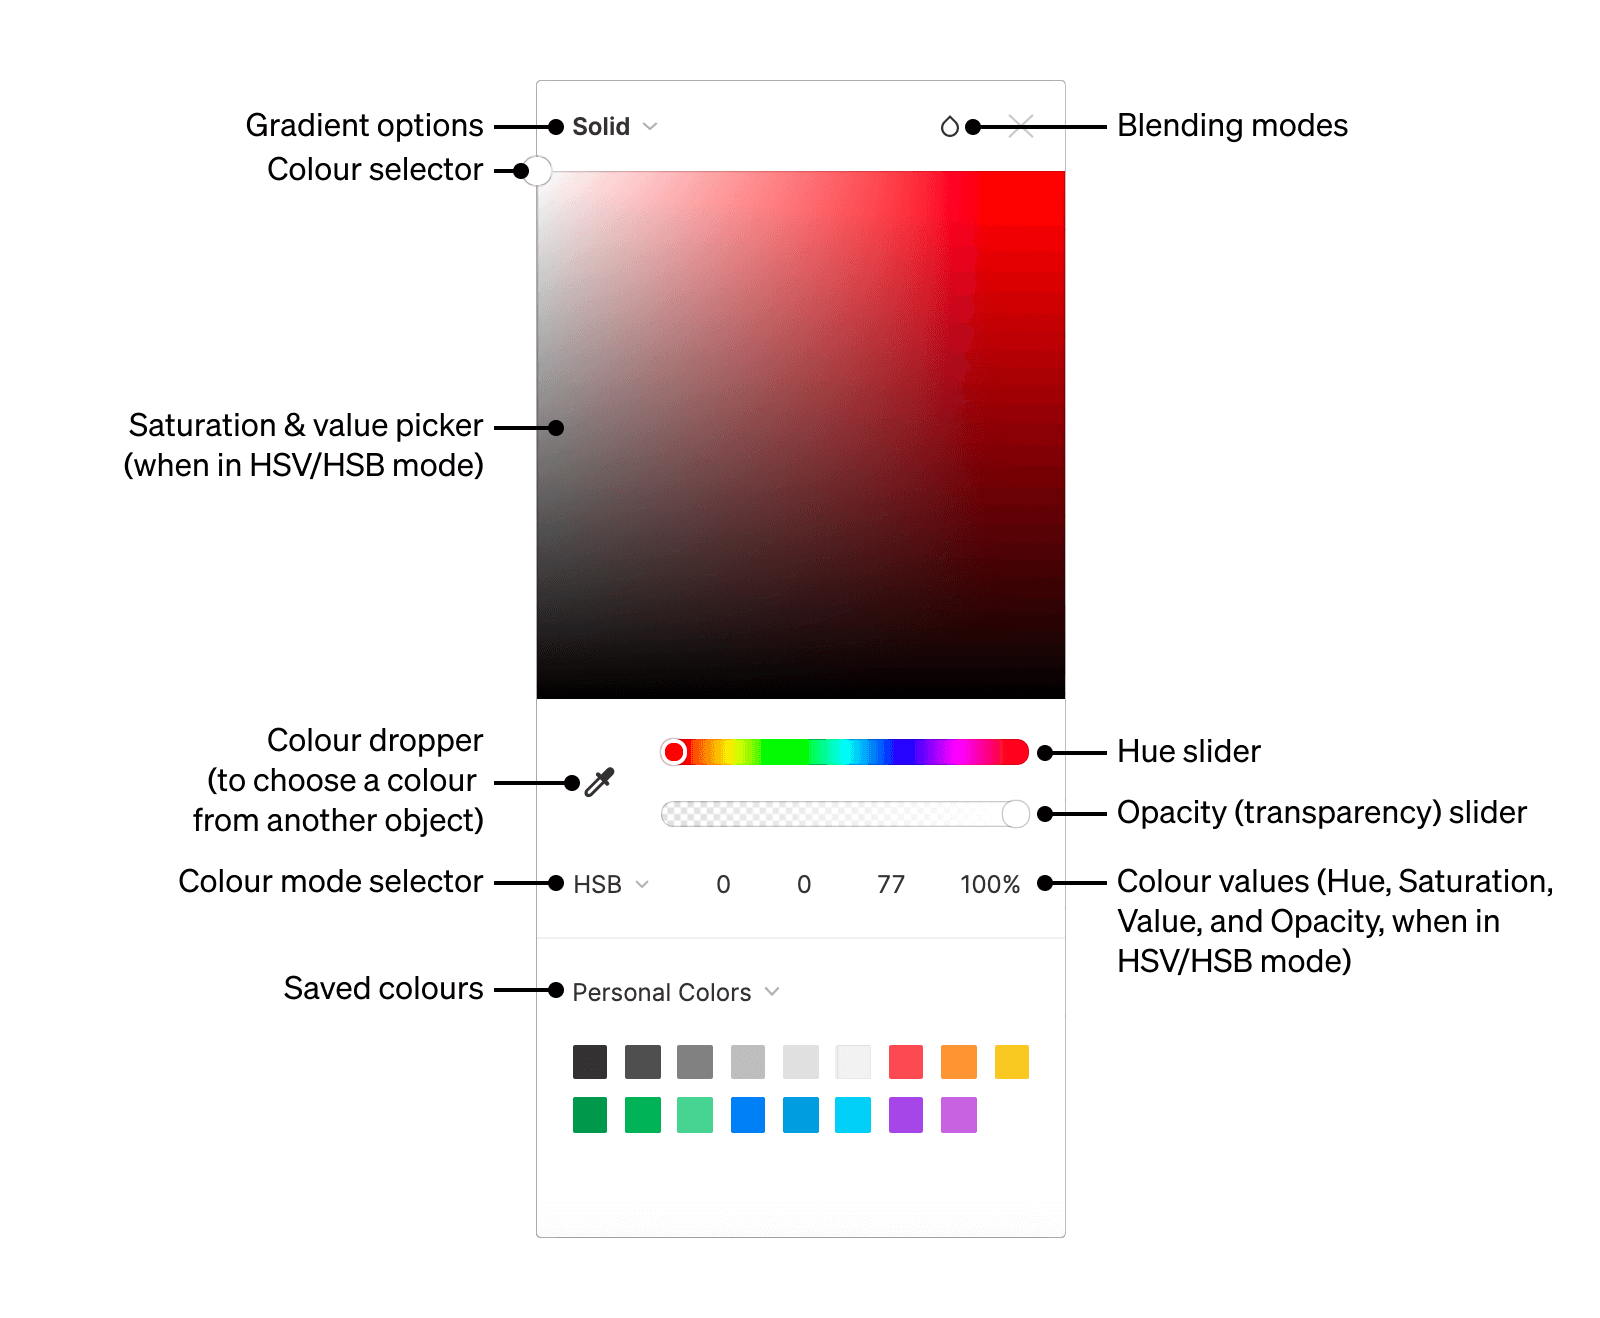
Most design software has a colour picker that looks something like Figma’s.
At first, the colour picker itself can be a bit intimidating, especially if you consider all the mysterious numbers and labels that are often shown beneath it (Hex, HSL, HSV, HSB, RGB, CSS, CMYK... the list goes on). But remember, you only need to work in HSB (also known as HSL) for now — you can ignore the other codes.
Let’s go through the colour picker step by step.
1. The colour picker area itself
This gradient area is a lot simpler than it looks — all it actually shows is two linear scales on top of each other.
The left-to-right gradient shows saturation for the selected hue, while the top-to-bottom gradient shows value.
Here they are shown separately:

Saturation (left) and value (right)
And here they are shown on top of each other — hey presto, the colour picker!

Saturation and value superimposed
2. The hue slider
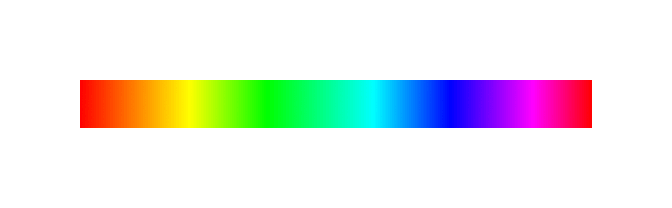
In most design software, this is shown beneath the colour picker area. This is where you pick your hue (remember, “hue” is colour in our ordinary, conversational sense — red, yellow, blue, etc.).
As you move the hue slider, you’ll see the gradient in the colour picker above it changing to match. Here are a couple of examples:
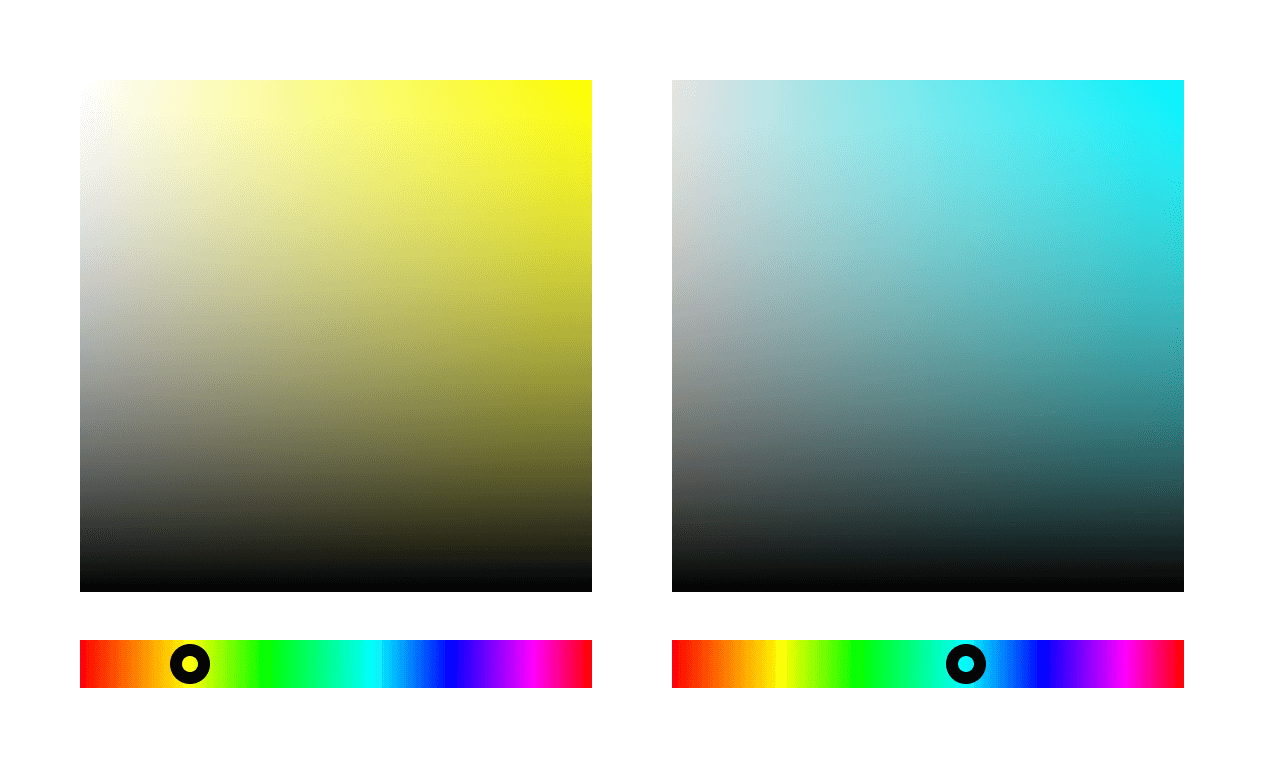
The colour picker with a yellow hue selected (left), and a cyan hue selected (right)
3. All those numbers
Depending on which piece of software you're using, you might see the numbers here in different sequences, or some might not be there. Here are the main things you can expect to see. These are all just different ways of encoding a colour choice.
Hex code
These are the codes used on the web to tell browsers which colour to use. They begin with a hash, and then follow a RRGGBB format (red, green blue). This is called a hex code because the numbers are “hexadecimal”, so each number runs like this:
0 1 2 3 4 5 6 7 8 9 A B C D E F
RGB code
This is another way of encoding a colour, except instead of using hexadecimal, each color (red, green, blue) simply runs from 0 to 100. So pure red is 100.0.0, pure blue is 0.0.100, etc.
HSB or HSV code
That the hue, saturation, value model we explored earlier in this lesson.
HSL code
This is slightly different from the HSV/HSB colour model: the L here stands for “lightness”, and present a slightly different conceptual model for colour mixing. Experiment and see if you can spot the differences in how it works!
Opacity
All of the colour modes above can store a fourth number besides red, green, and blue values: they can also store information about opacity. All colour systems conceptualise opacity from 0 to 100, with 0 being completely transparent, and 100 being completely opaque.
Opacity can be used to create layered effects, and it’s also a useful tool when building colour schemes for user interfaces. Note, however, that not all image file types can store transparency information. The most important of these is JPEGs. In most software, transparent pixels will get saved as white pixels in JPEGs.
In conclusion...
Now that you’ve learned the basics of using colour in Figma, in the next assignment we’ll move on to talk some more about the HSV (Hue, Saturation, Value) colour model.
Although it might sound complicated at first, the HSV model actually provides a simple and efficient way to make colour choices. Let’s go!