Course · Part 5 · Assignment 22
Apply 
Guided Brief: Design a Magazine Feature
Set Up Your Document in Figma or InDesign
![]() Time limit: 30 minutes
Time limit: 30 minutes
Remember to use your visual timer! We recommend the inventor’s iOS and Android apps — just search for “Time Timer” in the app store.
Explanation
In this short assignment, take a little time to get your Figma or InDesign document set up.
Trying InDesign?
If you want to try using Adobe InDesign for this project, you can sign up for a free trial of Adobe CC (if you haven’t had one before).
You can learn the basics of InDesign with Adobe’s free tutorials .
Instructions
To set up your document in Figma
- Open Figma and create a new Figma design file
- Press F and create a new A4 frame by selecting it in the Inspector panel on the right of your screen
- Repeat that step a further three times to create all four pages
Drag the frames so that they are directly next to each other (but not inside one another), forming two spreads. Your document should now look something like this:
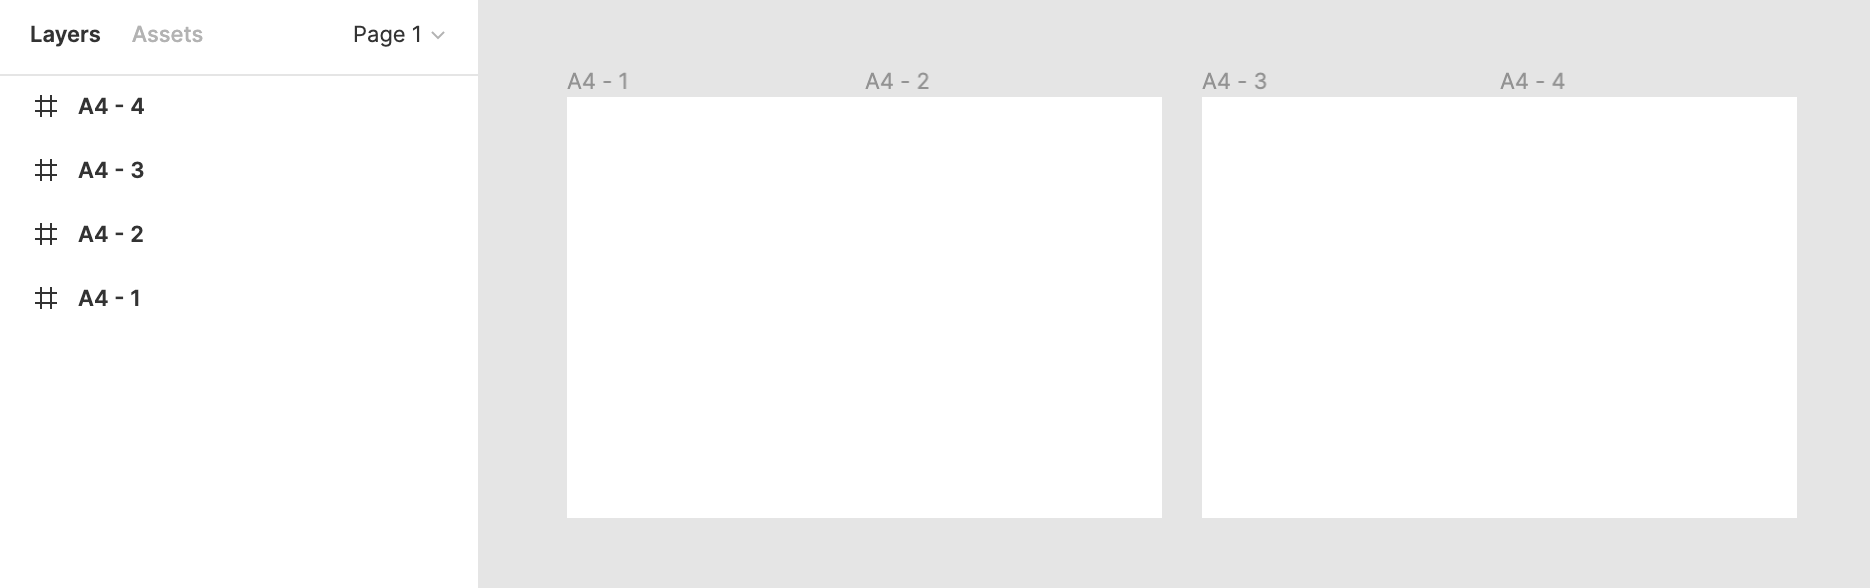
- Set up your grid for each page. You can apply the same grid to each page by clicking and dragging around your four frames to select them all, then changing the grid settings in the Inspector panel.
Tip
Because Figma is a digital design tool, it has some limitations when used for print design applications like this. One limitation is that a single element can’t run across two pages (frames).
If you want an element to run across two pages — for example, a big photo — duplicate that element, move it to the second page, and then position it so that it runs continuously.
To set up your document in InDesign
- Open InDesign and select File > New > Document
- Select the “Print” tab at the top of the “New Document” dialog box
- Under “Blank Document Presets”, select “A4”
- Under “Preset Details” on the right, set “Pages” to “5”
- Make sure the “Facing Pages” checkbox is ticked
- Set your columns and margins (you can change this later by selecting Layout > Margins and Columns)
Choosing a five-page document means that you have two blank, two-page spreads to work with for this project (pages 2-3 and 4-5).
Tip
To explore different versions of your design, duplicate your existing spreads by following these steps:
- Make sure the “Pages” panel is visible. If it’s not, you can enable it by selecting Window > Pages.
Where the page thumbnails are shown in the Pages panel, select all four pages of your current design by holding down shift and clicking each thumbnail. It will turn blue once selected:
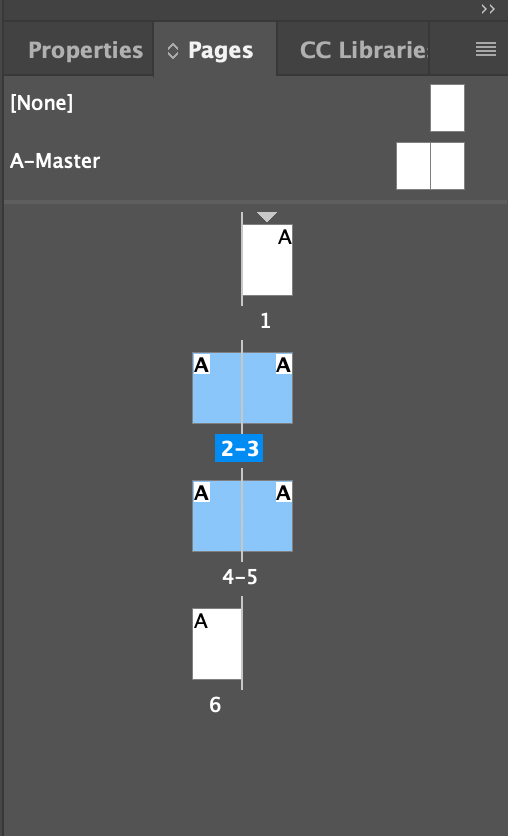
- Finally, hold down option on Mac, or alt on PC, then click and drag the page thumbnails to the end of the list of thumbnails (a little “+” cursor will appear next to the mouse pointer).
Hey presto! You have a duplicate of your page designs.
In conclusion...
Now you’re ready to start digitising your design. Head to the next assignment for instructions!